Google is Shutting Down Album Archive on July 19

I received an email on 17 June 2023 stating Album Archive will no longer be available from 19 July 2023. If you don’t know what Album Archive is, it is an storage of images and videos shared with people over older Google services like Google Hangout and background images uploaded in the Gmail theme picker prior to 2018. So, you can back up your data from there which is going to be deleted after 19 July.

What is the exact data which is going to be deleted

  1. Rare cases like small thumbnail photos and album comments or likes
  2. Some Google Hangouts data
  3. Background images uploaded in the Gmail theme picker prior to 2018

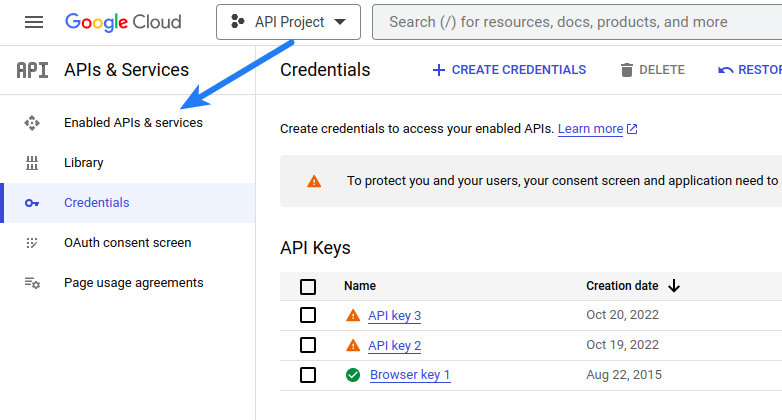
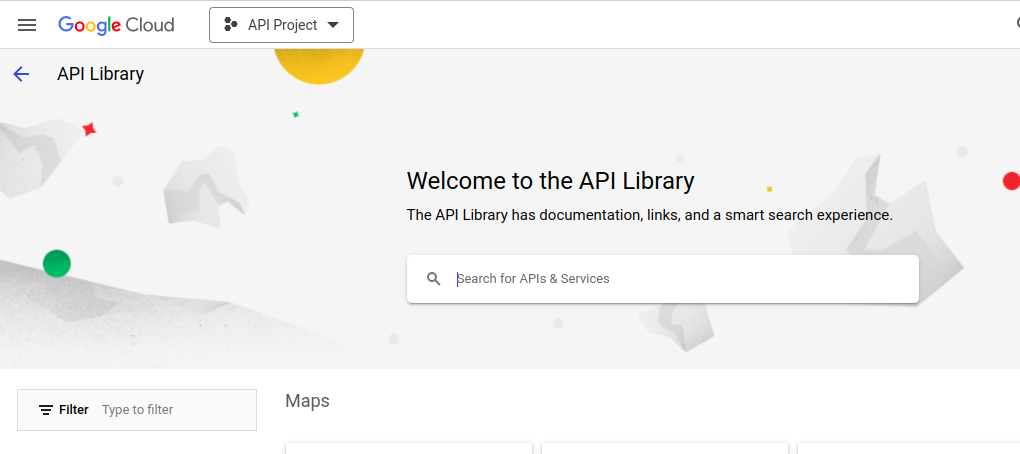
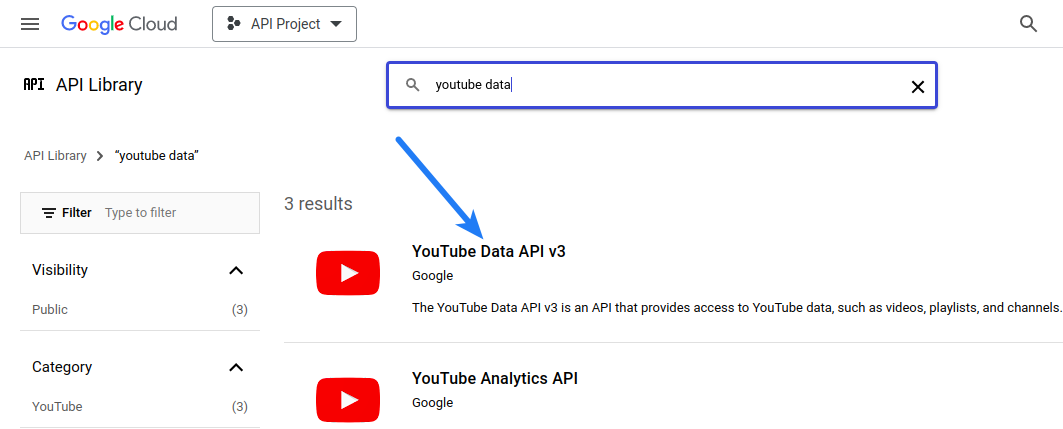
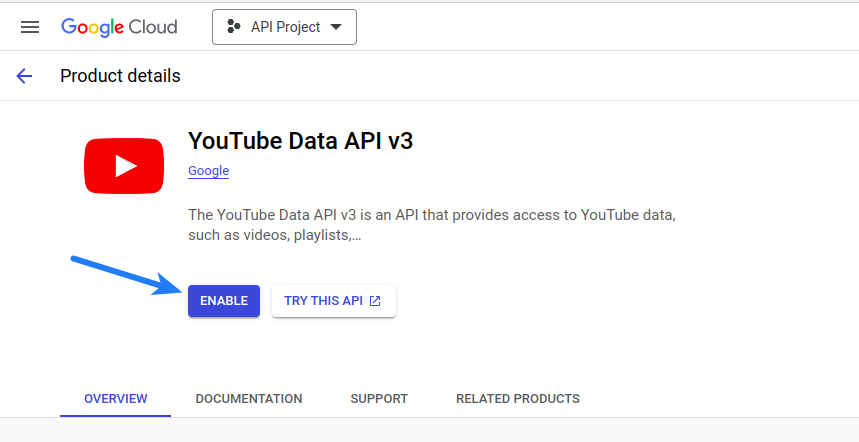
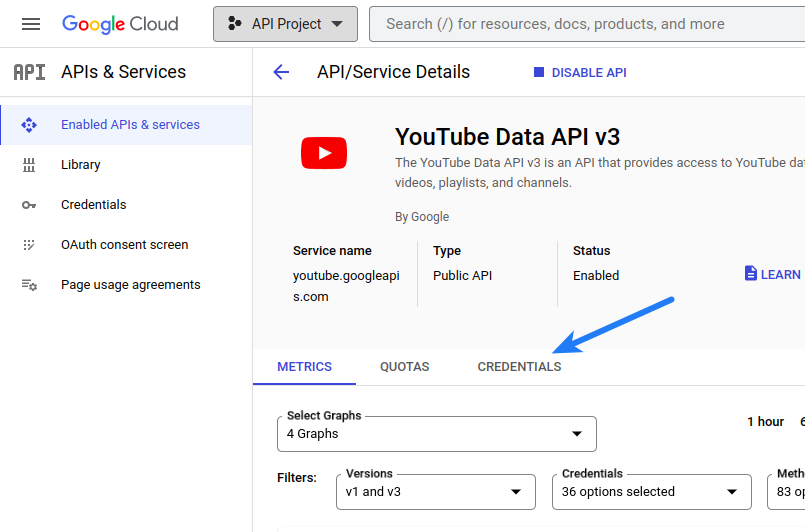
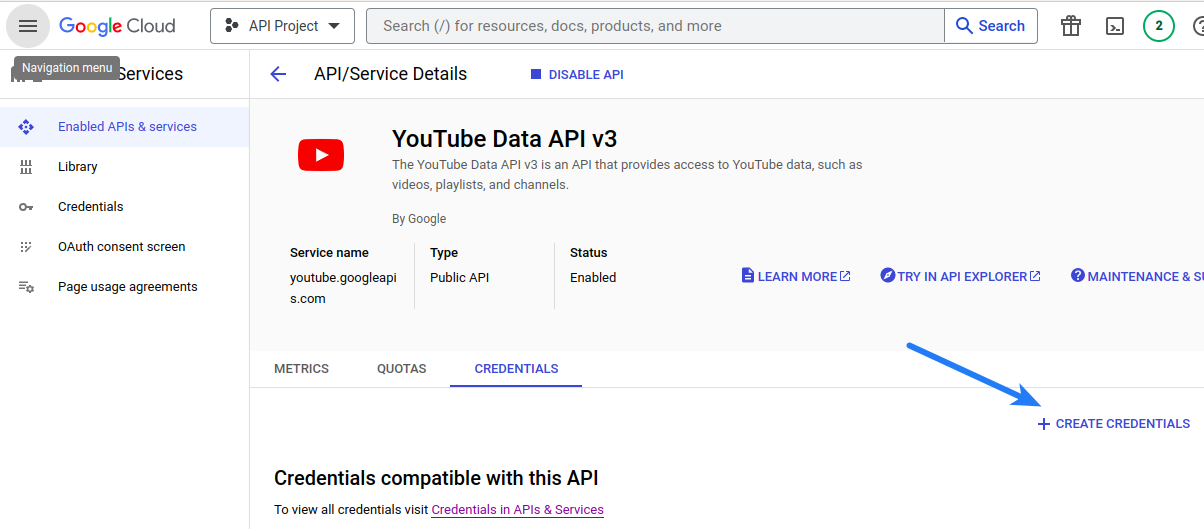
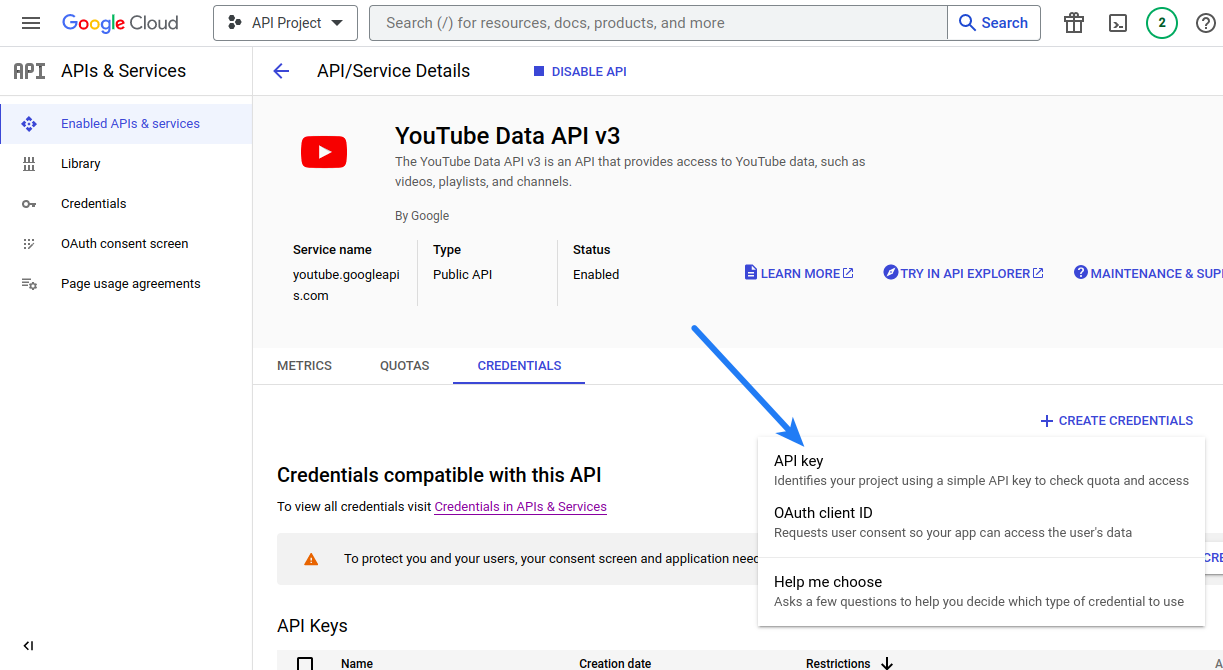
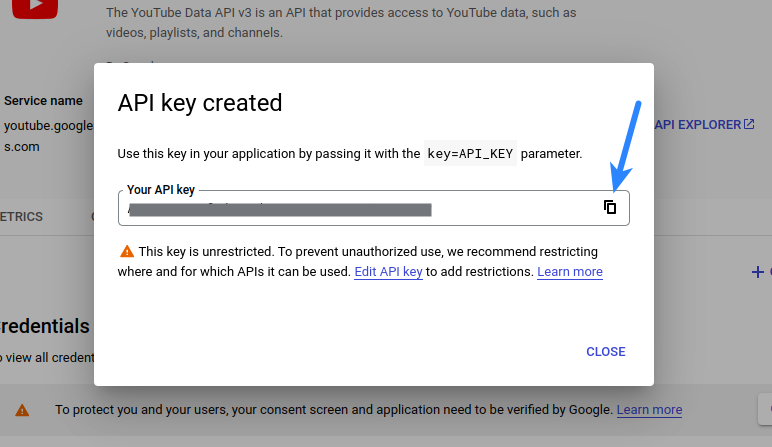
Related: How to Integrate Youtube Login with your website

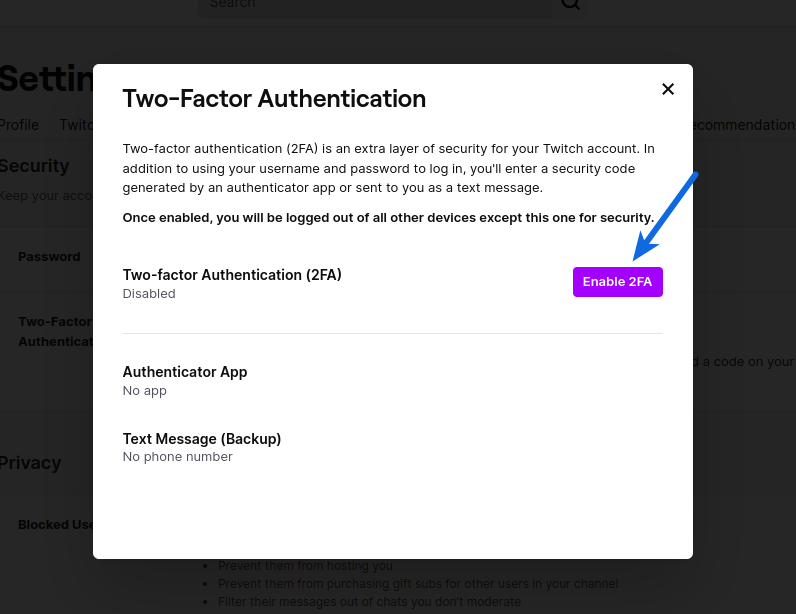
How to secure the data from Album Archive

You can use Google Takeout to download your data from Album Archive. Even after the Album Archive is no longer available, you can still use following Google Products to view and manage your content

Blogger: View and manage your image content
Google Account: View and manage your profile photos
Google Photos: View and manage your photo albums
Hangouts: Download your Hangout attachments

Turn On Two-Factor Authentication on Twitter Easy Way

You can turn on Two-Factor Authentication on Twitter for an extra layer of security. After this you will receive a code to your device to authorize the login to your Twitter account. This helps keeping your account safe against unauthorized access. Here are the steps for the same.

Related: Turn On Two-Factor Authentication on Twitch

Turn On Two-Factor Authentication on Twitter

  1. Click More in the menu at the left side in your Twitter dashboardTwo-Factor Authentication on Twitter
  2. Click Settings and Support > Settings and privacyTwo-Factor Authentication on Twitter - Settings
  3. Click Security and account access > Security Two-Factor Authentication on Twitter - Security and account access
  4. Click Two-factor authenticationTwo-Factor Authentication on Twitter - Two-factor authentication
  5. Here you have 3 optionsTwo-Factor Authentication on Twitter - Security Key

Related: How to Integrate One-Click Twitter Login to your WordPress Website

Turn On Two-Factor Authentication on Twitter via Text message

  1. Select Text message
  2. Read the overview instructions. Click Next
  3. Enter your password. Click Verify
  4. Confirm the email associated to your Twitter account if not done already. Enter your email address, then click Next. You will receive a confirmation code via email. Back in your Twitter account, enter the code in the prompt. Click Verify.
    Note: If you don’t already have a phone number associated with your account, you need to enter it. Additionally you can choose to deselect the option to allow your existing contacts to find you on Twitter. 
  5. Enter the confirmation code you received via text message. Type in the code, you will see a confirmation screen with a backup code. Save a screenshot of the code in case you need it for future use. This will help you access your account if you lose your mobile phone or change your phone number.
  6. Click Got it when you are finished with this screen.

Now, when you log in to your account on Twitter, a six-digit code will be sent to your phone to use during login. This ensures only you can login to your Twitter account.

Turn On Two-Factor Authentication on Twitter via Authentication app

  1. Select Authentication app
  2. Read the overview instructions. Click Start
  3. If prompted, enter your password. Click Verify
  4. Confirm the email associated to your Twitter account if not done already. Enter your email address, then click Next. You will receive a confirmation code via email. Back in your Twitter account, enter the code in the prompt. Click Verify
  5. Link your authentication app to your Twitter account by scanning a QR code. (If you don’t already have an app installed on your device, you will need to download one. You can use any time-based one time password (TOTP) authentication app like Google Authenticator, Authy, Duo Mobile, 1Password etc.)
  6. Scan the QR code. Click Next
  7. Enter the code generated by your authentication app. Click Verify
  8. You will see a confirmation screen. Click Got it to finish setup

Now, you can view and use codes to login to your Twitter account via your authentication app.

Turn On Two-Factor Authentication on Twitter via Security Key

  1. Select Security Key
  2. Enter your password when prompted
  3. Confirm the email associated to your Twitter account if not done already. Enter your email address, then click Next. You will receive a confirmation code via email. Back in your Twitter account, enter the code in the prompt. Click Verify
  4. Read the overview. Click Start
  5. Insert the key(s) into the USB port of your computer or sync it over your computer’s Bluetooth or NFC. Once inserted, touch the button on your key
  6. Follow the on-screen instructions and finish the setup
  7. Your security key(s) will appear in the Manage security keys section under Two-factor authentication. From there, you can rename or delete your security key(s) and add additional security keys to your account at any time.

How to Add Social Media Icons in WordPress Without Plugin?

Hi there. Welcome to another blog post. Today I am going to explain how you can add social media icons to your WordPress blog without using any plugin. Often you feel the need to show social media icons in your blog to redirect readers to your social media pages. You can do this easily without using any plugin or code.

Click the plus icon in the WordPress post editorAdd Social Media Icons - Click Plus Icon

Type Social Icons in the search box. Click the same in the search resultsAdd Social Media Icons - Social Icons

Click the Plus icon in the far right cornerAdd Social Media Icons - Add block

Search the social network you want to addAdd Social Media Icons - Select Icon

Click Browse all to see all 42 supported social networksAdd Social Media Icons - Search Icons

Once you have added the desired icons, click the individual icons and enter the URL where readers will be redirected after clicking these.Add Social Media Icons - Redirect URL

Two-Factor Authentication for iCloud. Here is How to Set Up

Hello and Welcome to another blog post. In this post I am going to explain how you can enable Two-Factor Authentication for iCloud (Apple ID) account.

Two-Factor Authentication adds another layer of security as it requires you to confirm the verification code sent to your device whenever you sign in to your account after you enter the password. It makes sure only the person who knows the password and has access to your device (mostly you) can sign in to your account.

You would like to check first if Two-Factor Authentication is available in your country. Learn more

Set up Two-Factor Authentication for iCloud (Apple ID)

Set up Two-Factor Authentication for iPhone, iPad or iPod Touch

  1. Navigate to Settings > [your name] > Password & Security
  2. Tap Turn On Two-Factor Authentication
    Two-Factor Authentication for iCloud
  3. Tap Continue
  4. Enter the phone number where you want the verification code to be sent when you sign in. Choose if you want to receive it via a text message or an automated phone call
  5. Tap Next
  6. Enter the verification code to verify your phone number and set up Two-Factor Authentication

Set up Two-Factor Authentication for Mac

  1. Choose Apple menu > System Preferences. Click Apple ID
  2. Click Password & Security under your name
  3. Click Turn On next to Two-Factor Authentication
    Two-Factor Authentication for Apple ID

Related: Own a Twitch Account? How to Set Up Two-Factor Authentication for Twitch

For macOS Mojave or earlier

  1. Choose Apple Menu > System Preferences
  2. Click iCloud. Select Account Details
  3. Click Security
  4. Click Turn On Two-Factor Authentication

Note: Latest Apple IDs come with Two-Factor Authentication active by default. In this case you will fine the Two-Factor Authentication feature already turned ON.

Upgrade to Two-Factor Authentication on the Web

  1. Navigate to appleid.apple.com. Sign in to your Apple account
  2. Answer the security questions and click Continue
  3. You will be prompted to upgrade your account security. Click Continue
  4. Click Upgrade Account Security
  5. Specify the phone number where you want to receive the verification code when you sign in. Choose if you want to receive the code via text message or automated phone call
  6. Click Continue
  7. Enter the verification code to verify your phone number and activate Two-Factor Authentication

System Requirements for Two-Factor Authentication

Following system requirements are recommended on all the devices you use with your Apple ID

  • iPhone, iPad or iPod touch with iOS 9 and later
  • Mac with OS X El Capitan and iTunes 12.3 and later
  • Apple Watch with watchOS 2 and later
  • Apple TV HD with tvOS
  • Windows PC with iCloud for Windows 5 and iTunes 12.3.3 and later

How to Enable Two-Factor Authentication on Twitch?

Setting up Two-Factor Authentication (2FA)

Twitch offers two-factor authentication (2FA) to protect your account against unauthorized access. Two-Factor Authentication (2FA) allows you to use two different methods of verification to login to your Twitch account, your password and your mobile phone. If your password is compromised, hacker won’t be able to access your Twitch account without the verification code sent to your phone.

Note: If you own a WordPress website, follow the steps mentioned here to integrate Twitch login with your website that allows your website visitors to login to your website in one click via their Twitch accounts.

Enabling Two Factor Authentication (2FA) on Twitch

Login to your Twitch account if not already logged in. Make sure the email associated to your Twitch account is verified. Navigate to the Security and Privacy settings page and follow the steps mentioned below to enable two-factor authentication.

  • Scroll down to the Security section and click Set Up Two-Factor Authentication button.
Set Up Two-Factor Authentication on Twitch
  • Click Enable 2FA
2FA Twitch
  • Enter your phone number and click Continue
Two-Factor Authentication on Twitch Phone Number
  • Enter the verification code you receive on your phone and select Continue
Two-Factor Authentication on Twitch Verification Code
  • If you have a preferred authentication app you can now scan the QR code displayed, using your phone camera. If you’re enabling Two-Factor Authentication on the Twitch mobile app you will need to use SMS
Two-Factor Authentication Factor Authentication on Twitch QR Code
  • If you do not have an authentication app you will need to download one from your phones respective app store. You may also opt to use SMS as an authenticator if you are unable to use an authenticator app.
  • After scanning the QR code, enter the 6 digit verification code generated in the authentication app. Click Submit.

Congratulations, you have secured your account with Two-Factor Authentication (2FA).

How to Embed Instagram Feed to Any Website?

There is an easy way to embed Instagram feed to your website.

But why would you do that?

Displaying Instagram feed on your website allows you to boost your account’s exposure without a lot of work and it’s a fresh way to engage with your prospects. Apart from that, doing so can increase your customer conversion rate in the long run.

So here are the steps.

Embed Instagram Feed to any Website

Step 1: Decide which Instagram Post You Want to Display

Login to your Instagram account. Click the post that you want to embed.

Click the three dots in the top-right corner.

Embed Instagram Feed - Select the Post

Click Embed.

Embed Instagram Feed - Select Embed

Copy embed code.

Embed Instagram Feed - Copy Embed Code

Step 2: Edit the web page where you want to embed

Edit the web page and paste the HTML code you copied. If you are using WordPress, click the Plus icon.

Embed Instagram Feed - Click Plus Icon

Select Custom HTML and paste the code you just copied.

Embed Instagram Feed - Custom HTML

Save the changes to the web page.

Congratulations. You just embedded an Instagram post to your website

How to Copy Shortcodes and Code Snippets Properly in WordPress

Copying Shortcodes and Code Snippets from a web page and using in your own web page is not as easy as it looks especially when you are using visual mode of the page editor.

For example, if you copy the shortcode from the page and paste it in the content of your web page in the visual editor, you might get unexpected results because of the unwanted HTML being copied along with the text of the shortcode. At the link mentioned above the shortcode

is wrapped inside the <code> HTML tags. See the screenshot below.

You might end up copying the <code> tag with the shortcode and this could mess with the layout of the HTML block generated by the shortcode. To avoid this, you can use shortcut key Ctrl + Shift + V to just paste the text leaving any other HTML copied along. This option can also be accessed by right clicking the editor where you want to place the shortcode and selecting Paste as plain text in the context menu.

Another way to place shortcode properly is to use the Shortcode block in the Gutenberg editor.

Now Track Social Shares for Every Social Network

From version 7.13.20, you can track shares for every social share network you have integrated at your website by using the add-on Social Shares Tracker. Facebook had recently stopped serving shares via their graph API which Super Socializer used to show Facebook shares and this change has vanished the Facebook shares being displayed with the Facebook share icon at the websites that are using this plugin. Solution to track Facebook shares again is to use the add-on Social Shares Tracker as mentioned above.